How to Do Gta 5 Easy Stunts
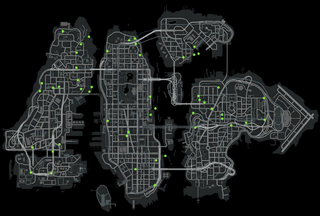
Whattheydonotwantyoutoknow in-game map.
Stunt Jumps are a collectible in Grand Theft Auto IV.
Description
The player must complete all 50 jumps in order to achieve 100% completion in Grand Theft Auto IV.
On screen messages will inform the player of their progress towards completion of all of the jumps:
- If the stunt jump is successful, the game will report "Stunt jump completed" then "XX stunt jumps left to do."
- Successful, already completed: "Stunt jump completed again"
- If the stunt jump is unsuccessful, the game will report "Not good enough."
- Unsuccessful, already completed: "Not Good enough, but you have already completed this stunt jump"
Some jumps do not require Niko Bellic to make it a certain distance, instead they must simply land the jump. Other jumps have very strict requirements that are hard to determine. These details have been explained below where known. A jump can sometimes be marked successful even when Niko falls off on landing.
There are numerous locations with ramps around Liberty City that appear to be Stunt Jump sites but aren't. Several missions provide opportunities to complete stunt jumps during chase sequences.
Jumps are greatly aided by use of a motorcycle. Some jumps are almost impossible without one. Two water jumps require use of a boat.
Once all 50 are completed, the player will receive the Dare Devil achievement.
List of all stunt jumps
| Jump #! | Jump Description | Area/Map | Landing Spot/Requirements |
|---|---|---|---|
01 | Franklin Street, eastbound, straight ahead as the street turns 90° south. | Dukes - Steinway | Dukes Boulevard - clearing the fuel tanker yard. |
02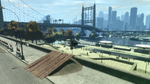 | Morris Street, westbound, straight ahead at the junction of Concord Avenue. | Dukes - Steinway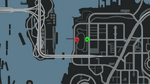 | Over the park towards Franklin Street. Even landing in the pool counts. |
03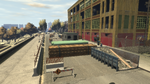 | Concord Avenue, northbound, construction trash dumpster on the right side of the blocked road. | Dukes - Steinway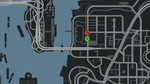 | Junction of Morris Street, over the shed, clearing all the construction blockage is not required. |
04 | Alley behind Famous Cleaners, Tinconderoga Avenue, westbound. | Dukes - Steinway | Over the wall into the ground of the junkyard on Concord Avenue. Landing on the junk will not count. |
05 | Railway tracks parallel to Creek Street, westbound. Wooden plank ramp at the end of the line. | Broker - BOABO | Over the container and fence, down to BOABO Promenade, near the Sprunk sign. |
06 | Car parking access ramp eastbound on the north side of Hooper Street at the junction of Dukes Boulevard. | Dukes - East Island City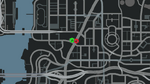 | Over the low wall and pavement onto Dukes Boulevard. |
07 | San Jacinto Avenue southbound, straight ahead at junction with Livingston Street. | Dukes - Cerveza Heights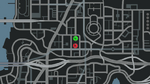 | Rooftop which immediately leads to jump #8. |
08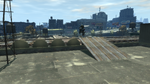 | From jump #7, rooftop, north side of Huntington Street. | Dukes - Cerveza Heights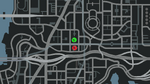 | Over Huntington Street LTA tracks to Thornton Street. |
09 | Narrow ramp in the center of the four lane Algonquin Bridge, westbound. | Broker - Rotterdam Hill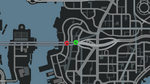 | Pedestrian walkway, lower bridge level between the LTA tracks. |
10 | Tutelo Avenue northbound, straight ahead at the junction with Carson Street. | Broker - Beechwood City | Over the Algonquin - Dukes Expressway towards Huntington Street. |
11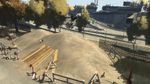 | Freetown Avenue southbound, straight ahead at the junction with Lynch Street. | Dukes - Willis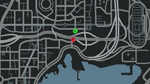 | Over the Algonquin - Dukes Expressway towards Carson Street. Landing in the obvious target "chute" between the billboards is not required. |
12 | Tudor Street (north section) eastbound, turn northeast as the street curves south, using a sign on a pile of gravel as the ramp. | Dukes - Francis International Airport | On to the Expressway. |
13 | Tudor Street (east section) southbound, straight ahead as the street curves west, using a half-filled dumpster as the ramp. | Dukes - Francis International Airport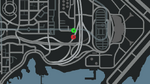 | On to the Expressway onramp. |
14 | Southwest from Lompoc Avenue north side of the elevated LTA tracks, straightening westwards over the blue ramp. | Bohan - Industrial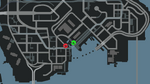 | Over the water to Beaumont Avenue/Windmill Street. |
15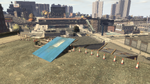 | Attica Avenue south of Rocket Street, northbound up the new expressway construction, blue ramp at the end. | Bohan - South Bohan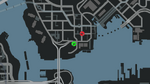 | Over S&M Auto Sales to Guantanamo Avenue. |
16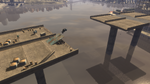 | Northern Expressway bridge construction, westbound, ramp is at the end after the crane. | Bohan - Industrial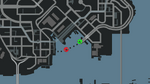 | "Island" bridge construction section leading immediately to jump #17. |
17 | Northern Expressway bridge construction, westbound from jump #16 landing. | Bohan - Industrial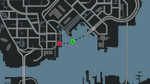 | Rooftop/Rocket Street. |
18 | Southwest through the parking space between two apartment buildings on Galveston Avenue opposite Xenotime Street. | Algonquin - Northwood | Over Ivy Drive North. |
19 | Eastbound through the western parking area of the apartment buildings on the east side of Exeter Avenue. The slope for the ramp is on the right of the steps. | Algonquin - Northwood | Into the main eastern car parking area of the apartment complex. |
20 | Main eastern entry to the same apartment complex in jump #19, southbound along Grummer Road. Metal ramp faces southeast in the road repair work. | Algonquin - Northwood | Under Frankfort Avenue/Northwood Heights Bridge archway. |
21 | Eastbound on the north side of Vespucci Circus under the LTA track on the left, a collapsed building with a rubble ramp pointing northeast. | Algonquin - Northwood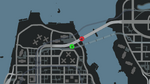 | On to the Northwood Heights Bridge/Grand Boulevard. |
22 | Eastbound on Wardite Street, straight ahead at junction with Astoria and Vespucci Circus, metal ramp on the right side of the building. | Algonquin - East Holland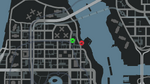 | Over Walnut Way. |
23 | Southbound in the centre divider construction zone on Union Drive East, a metal ramp on a rubble pile just south of the Middle Park East Safehouse. | Algonquin - Middle Park East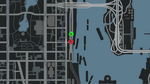 | Under the pedestrian overbridge to the Obsidian Street junction. |
24 | The elevated disused LTA track that starts above Hematite Street and finishes above the Pay 'n' Spray on Lorimar Street. | Algonquin - Purgatory | Jump past the Pay 'n' Spray can down to Union Drive West. |
25 | On the rooftop of the Civilization Committee complex, Albany Avenue. Note: a four-star wanted level will be earned when entering the complex. Up stairways and metal ramps to get to the rooftop. Northbound ramp is on the east side of the dome. | Algonquin - Hatton Gardens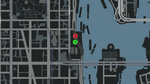 | Down to the park/garden area at the north side of the complex. |
26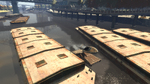 | Boat jump: Humboldt River northbound between two barges anchored at the northeast corner of the Civilization Committee HQ. | Algonquin - Humboldt River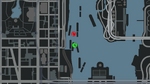 | Just "land" it. |
27 | A half-filled dumpster southbound in the middle of Denver-Exeter Avenue and Burlesque south of Kunzite Street. | Algonquin - Star Junction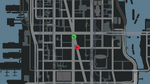 | Burlesque near Star Junction Police Station. |
28 | Eastbound on Jade Street, a half-filled dumpster on the right side of the road at the south edge of Star Junction. | Algonquin - The Triangle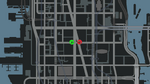 | Jade Street. |
29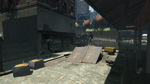 | Alleyway on north side of Emerald Street, northbound, in the easternmost block between Borlock Road and Privateer Road. | Algonquin - Fishmarket North | Feldspar Street just east of the LCPD HQ. |
30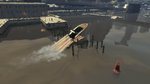 | Boat jump: Humboldt River northbound just south of Leaper's Bridge. Wooden jump just after three barges line-astern. | Algonquin - Humboldt River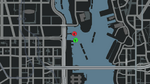 | Just "land" it. |
31 | Westbound on Diamond Street under the arches of the Algonquin Municipal Building on Columbus Avenue. | Algonquin - City Hall | Denver Avenue. |
32 | Eastbound on Amethyst Street, straight ahead at the junction with Albany Avenue. | Algonquin - The Exchange | Over the Freeway to Flatfish Place/Bus Lane. |
33 | Service alley behind Deli and Grocery stores on Big Horn Drive, ramp is in the northwest corner above Cassiar Avenue. | Alderney - Westdyke | Down to Beaverhead Avenue. |
34 | Beachfront north of the end of Applewhite Street, northbound, a natural sand dune bank over the water ingress and rocks where beach access is interrupted. | Alderney - Westdyke | Opposite bank over the water. |
35 | Beaverhead Avenue southbound, straight ahead at the junction with Sacramento Avenue, the residential driveway slope is the ramp. | Alderney - Westdyke | Alleyway north of Percell Road. |
36 | Car parking building on Sacramento Avenue, top level, westbound. | Alderney - Westdyke | Down to Lemhi Street. |
37 | Sacramento Avenue southbound, straight ahead at the junction of Franklin Street, just to the left of the beauty salon into the alleyway, a natural grass bank forms the ramp over the low brick wall. | Alderney - Leftwood | Under the Plumbers Skyway to Panhandle Road is enough, although a full run-up on Sacramento Avenue will enable the jump to go over the Plumbers Skyway all the way to Hubbard Avenue/Mahesh Avenue which will also count. Landing on Plumbers Skyway does not count. |
38 | Applewhite Street, westbound from Mahesh Avenue, a half-filled dumpster on the right behind the bus stop is the ramp. | Alderney - Alderney City | Down to Rael Avenue. |
39 | Applewhite Street, just west of the Alderney Safehouse, the alleyway left of the Sportswear Gallery, a gravel pile ramp points southeast over the wall. | Alderney - Alderney City | Down to Rand Avenue alleyways. |
40 | Eastbound on Mahesh Avenue past the Alderney Safehouse, straight ahead at the junction with Rand Avenue, the ramp on the norteast corner of the building overlooking the river. | Alderney - Alderney City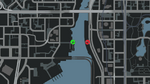 | Over the West River to Middle Park West, Algonquin near Union Drive West. |
41 | Riverside boardwalk, southbound through the tunnel under the building on Rand Avenue opposite Mahesh Avenue. Wooden planks form the ramp over the railings. | Alderney - Alderney City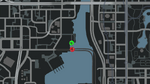 | Over the water onto the helipad. |
42 | Dirt driveway on the west side of Keneckie Avenue behind the collapsed buildings, south-southwest direction, a gravel and rubble pile forms the ramp. | Alderney - Alderney City | Over Plumbers Skyway. |
43 | Northbound on Aspdin Drive, straight ahead as it curves east, a half-filled dumpster is the ramp, in between storage garages. | Alderney - Berchem | Onto Plumbers Skyway, potentially head-on into southbound lanes. |
44 | Alleyway between Kill-Em-All and DeeDees Bargain Center, south side of Bedrock Street, southbound, a half-filled dumpster is the ramp. | Alderney - Alderney City | West side of Koresh Square. |
45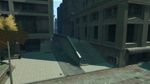 | Northbound on the east side of Koresh Square, straight ahead the steps up the west side of the building form the ramp. | Alderney - Alderney City | Through to Jonestown Avenue. |
46 | West side of the derelict bridge northbound from Plumbbob Avenue/Red Wing Avenue junction. Ramp at the end of the lane. | Alderney - Tudor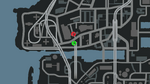 | Over Tinderbox Avenue. |
47 | Central off-ramp of Plumbers Skyway southbound, straight ahead over Barsac Avenue, the ramp on the water's edge. | Alderney - Tudor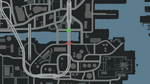 | Directly under Plumbers Skyway, over the water to Plumbbob Avenue. |
48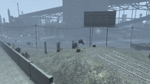 | Rail lines east of Roebuck Road inside Port Tudor, west side of the Chess Tea building. Southbound the rails go up an incline and stop, forming the ramp. | Alderney - Tudor | Onto Latchkey Avenue. |
49 | Westbound on the southernmost part of Plumbers Skyway, straight ahead crossing oncoming lanes as it curves north, to a broken section of the wall with a low dirt pile forming the ramp over the curb. | Alderney - Acter Industrial Park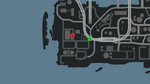 | Down to Acter Nuclear Power Plant, south of Red Wing Avenue. |
50 | Eastbound on the southernmost part of Plumbers Skyway, straight ahead as it curves north, to a broken section of the wall with a low dirt pile forming the ramp over the curb. | Alderney - Acter Industrial Park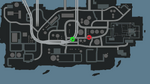 | Down to Grenadier Street. |
Gallery
Video Walkthrough

Source: https://gta.fandom.com/wiki/Stunt_Jumps_in_GTA_IV
Enregistrer un commentaire for "How to Do Gta 5 Easy Stunts"